
When I read this my head went 'WOW!' and my tummy went ' Yum...'!! I can't wait to make this icecream packed with lots of yummy goodness. And I thought this would be a great recipe to tempt your tummy :)!!
You will need some of these recipes to make this glorious icecream (or use your own or store bought - up to you :).
Caramel · GF (about a pint)

12 ounces cream
1 vanilla bean, split and scraped
1½ ounces butter
7 ounces sugar
¼ tsp salt
Bring the cream to a boil with the vanilla bean. Steep for an hour, or as long as you can. If you don’t have that kind of time, use 1 Tbsp of vanilla extract instead.
Caramelize the 7 ounces of sugar by setting a large pot over a medium flame. Sprinkle with some of the sugar to form an even coat over the bottom of the pan. As the sugar melts, sprinkle in a little more. This is a slow process. Shake and swirl the pan to mix, don’t stir. If you notice a hot spot that is caramelizing too fast, sprinkle extra sugar there to “put it out” so to speak. When all the sugar has been added and liquefied, cook until it reaches a foxy brown color.
Immediately pour in a quarter of the cream, and stir. It will bubble and foam and if you didn’t listen to me and used a small pot, you may experience a dangerous overflow, burn your toes, and spend the rest of the day cleaning caramel from your stove. But, if you have a large pot, you’re safe. The mixture will foam up, but not out. Stir, being careful of the steam that’s undoubtedly coming from the pot. The sugar will clump. Worry not.
When the foam subsides, pour in more cream, repeating until it’s all been safely added. Stir and simmer until any clumped up sugar has dissolved. Then stir in the butter, salt, and vanilla bean scrapings.
You can strain the mixture if you like, to sieve out any bits that may have not dissolved. I like to leave the vanilla bean in until just before serving, so it continues to infuse the caramel.
And another recipe...
Brown Butter Hazelnut Brownies

16 ounces unsalted butter
12 ounces dark chocolate (70% minimum) chopped
1 vanilla bean, split and scraped, seeds reserved or 2 Tbsp vanilla extract
7 ounces toasted hazelnuts, skins removed
4.5 ounces cocoa powder (not Hershey’s. I’m serious.)
6 eggs
21 ounces sugar
1 tsp salt
1 Tbsp instant espresso powder
optional: additional chocolate for drizzling or dipping
Preheat the oven to 325°.
Line a 9“x13” metal baking pan with a sheet of aluminum foil; one long strip down the middle and hanging over the ends will get the job done. This will make removing the brownies super easy, and cleaning up a little less onerous. Alternately, lightly greases 15, 4” round tart pans.
What to do: melt the butter, along with the vanilla bean, in a medium saucepan over low heat until liquefied. (If you’re using vanilla extract, don’t add it now. Add it in later, with the salt and espresso.)
Crank up the heat to medium low. The mixture will bubble, possibly spit, and make a lot of noise. Keep an eye on it, and keep simmering. You’ll notice brown bits forming on the bottom, you don’t want these bits to turn black*. Don’t bother with stirring or skimming, just watch and listen and possibly turn down the heat if it looks too toasty. After a while, the butter will really go ninja silent, which means you’re done.
Now remove from/shut off the heat and add in the chocolate. Whisk, scraping along the bottom to mix up the browned bits, until smooth. The mixture will be quite thin. Set off the heat to cool.
Put the hazelnuts and cocoa in the bowl of a food processor and pulse until finely ground. Don’t bother sifting, the nibby bits of hazelnut are really nice in the finished brownie. Set aside.
With a hand mixer or stand mixer fitted with a whisk attachment, combine the eggs, sugar, reserved vanilla seeds (or vanilla extract if you’re going that route), salt, and espresso powder. Whip on medium speed for about 5 minutes.
Turn down the speed on the stand mixer to low and pour in the butter/chocolate mixture all at once. Immediately add in the dry ingredients and keep mixing until just incorporated.
Pour or spoon into the prepared pan or pans. Bake about 30 minutes for the large pan, and closer to 15 for the 4” rounds. Bake until just slightly firm to the touch. They may not seem totally done when you pull them out, but this particular brownie is so very dense that it will retain its heat and keep cooking for quite some time. Err on the side of gooey.
Cool the brownies thoroughly before cutting or removing from the pans.
In the case of the 9“x13” pan, lift the brownies out of the pan by tugging on the foil. If you’re looking to get extremely neat squares, refrigerate the brownies for an hour before cutting.
In the case of the 4” rounds, wedge a toothpick between the brownie and the pan, wiggle to loosen the brownie, then flip the pan over and rap firmly against the counter. It should pop right out, but if you have trouble, keep toothpicking around the edges until the brownie comes out.
In either case, drizzle or cover in tempered chocolate if you like, or serve them as-is.
*If you were to accidentally blacken your butter, you can still save the day! Instead of mixing the chocolate into the butter, strain the butter into the chocolate, so as not to incorporate any of the burned bits. The butter will have a pronounced toasty flavor, but it is actually quite yummy. I’ve saved a batch or two with this method, so fear not.
And then homemade Nutella if you want...

7 ounces water
15 ounces sugar
6 ounces corn syrup or honey
3 ounces butter (you may omit the butter for vegan/lactose free)
1 vanilla bean, split and scraped, bean minced (directions below)
10 ounces hazelnuts, toasted, skinned, and roughly chopped
8 ounces dark chocolate (preferably not from chips), melted & cooled
1 ounce cocoa powder
3/4 tsp salt
6 to 8 ounces hazelnut oil
Lightly grease a sheet pan with butter and set aside.
To prepare the vanilla bean, split it in half and scrape; add the bean paste into the sugar. Now, cut the bean halves in half, lengthwise. Now mince these four strips as finely as you can. Rub your vanilla coated fingers in the sugar to “clean” your fingertips without wasting the vanilla
Combine the water, sugar and vanilla bean paste, corn syrup, butter, and minced vanilla bean in a sauce pot. Turn the heat to medium and stir gently while heating to dissolve the sugar. Once the mixture starts to boil, stop stirring and let it carry on, undisturbed.
Cook until the mixture has a pale golden color, about 300° on a candy thermometer. This temperature yields the most authentic “Nutella” flavor. If you’d like a more pronounced caramel flavor, let the mixture darken to a foxy amber. But, as I said, 300° is perfect.
Shut off the heat, add in the toasted hazelnuts and stir thoroughly. Pour the mixture onto the sheet pan and spread it out with your spatula. Compared to the average batch of nut-brittle, there are a lot of nuts and not so much brittle. So the mixture will seem quite thick, but that is quite fine.
When the brittle has cooled completely, chop it roughly with a knife to make it a little more manageable for your food processor. Take care if you break it up with your hands. I’ve actually cut myself pretty badly before with a sharp piece of brittle. (Brutal brittle!)
Put about half the brittle in the food processor and begin pulsing to chop it into smaller bits. Add the rest of the brittle in, pulsing the blade all the while, and then just let the processor run until it begins to form a paste.
Shut off the processor, pour in all of the cooled chocolate, cocoa, and salt. Replace the lid and continue to run until the mixture is homogeneous. Then, with the mixer still running, slowly drizzle in the oil. Use the full 8 ounces if you would like a thinner texture, use less for a thicker, more traditional spread.
If you’re anything like me, you will immediately begin dipping any available food stuffs into the mixture, baguette being the first and best option. Bananas second. Followed by pretty much anything. Once you’ve had your fill, transfer the mixture to jars. You’ll have about 5 cups, depending on how hard you snacked first.
When it’s fresh off the food processor, the mixture will be disturbingly liquidy. But it will set up to smooth, creamy, Nutella-like texture as the chocolate cools. If your kitchen is quite cold, it will set up much faster. I made this at work where it is about 60° and it set up fast. Whenever I make it at home (a balmy 72°) it can take several hours.
Store at room temperature, for up to two weeks. Refrigerate or freeze indefinitely. Just take care not to microwave the mixture if you are thawing it out, the heat will cause the crystallized sugar to melt out, destroying the additively crunchy texture of the paste.
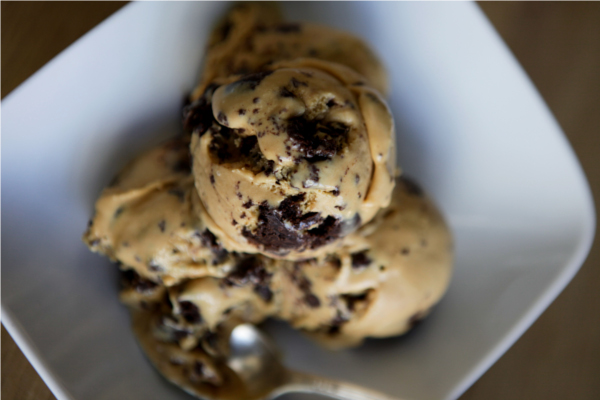
And at last the ICECREAM recipe!
20 ounces (1 batch) caramel, still warm
3 ounces milk
3 ounces cream
1/2 vanilla bean, split and scraped
2 ounces egg yolks
2 ounces sugar
1/4 tsp kosher salt, or more to taste
6 ounces brown butter hazelnut brownie chunks
2 ounces "Nutella"
In a small pot, bring the milk and cream to a simmer with the vanilla bean pod. When the mixture begins to bubble, shut off the heat and cover with a lid. Steep for one hour.
If you haven’t already made the caramel, this would be the perfect time. Either way, once you’ve got it, put the caramel in a medium bowl and place a sieve over it. Set aside until later.
When the dairy has finished steeping, return it to a simmer. Whisk together the yolks, sugar and salt in a small bowl.
Once the dairy begins to simmer, fish out the vanilla bean and use a spatula to scrape out all of the heavily flavored cream from inside the pod. That stuff is liquid gold, make sure not to lose a drop. It’s easier to scrape out the vanilla pod while it’s still warm (hence bringing the mix to a simmer) because when cold, the vanilla-goo congeals and sticks more resolutely to the bean.
Now, whisk some of the hot dairy mixture into the egg yolks, one ladle-full at a time, until the egg mixture is quite warm. Then whisk the egg mixture into the pot of cream and turn the heat to medium low. Stir constantly, making sure to scrape all along the bottom of the pot while to avoid allowing any of the mixture to curdle.
Continue cooking and stirring until the ice cream base thickens markedly (“coating the back of a wooden spoon” being the popular description of done-ness).
Immediately shut off the heat and strain the custard through a sieve and into the bowl of caramel. Whisk them together until thoroughly combined.
Give the base a taste and see if you’d like to add more salt. I call for a 1/4 tsp of salt, but really, that’s just a starting point; some people like their “salty caramel” really salty and others like just a hint. Just bear in mind the ice cream will be paired with brownie chunks and "Nutella", so salt plays an important roll in offsetting all that sugar.
Cool in an ice bath and refrigerate overnight. Process in an ice cream maker according to manufacturer’s directions. In my experience, this ice cream can take much longer to freeze than other ice creams. Don’t be alarmed, it will churn up eventually, just give it some extra time.
While the ice cream is churning, toss the brownie chunks with the "Nutella" in a medium bowl, until evenly coated. The measurements given are rough; you may find you want more chunks or more "Nutella." Use your judgement; remember more is more.
When the ice cream has finished churning, fold in the "Nutella" coated brownie chunks, transfer to a container and freeze.
I hope that you enjoy.....I know I will...yum, yum!
No comments:
Post a Comment